Tag: Adventures in Materiality

  • Adventures in Materiality, 2: Carving the Flood: An Amateur Attempt

    Image of the Flood Tablet as stored in the British Museum: accession number K.3375.
    Lineart of the Flood Tablet as documented in the CDLI: accession number P273210..

    0. Prologue: Why Copy the Flood Tablet?

    Replication has become one of my favorite hobbies. I love artifacts, but as any archaeologist or collector will tell you, the barriers to actually owning them are steep—financial, legal, and ethical. How do you store them? protect them? justify having them at all? But when you make something yourself—when you replicate an ancient object by hand—you bypass all that. You get the closeness—a heightened closeness, I’d say—without the risk.

    That’s what drew me to recreate the Flood Tablet. Buying a cast would’ve set me back about a hundred dollars. But I wanted to see what I’d learn if I made one myself. Not just held it, but shaped it. Because creating a replica doesn’t just mimic an object—it stages a kind of encounter. You begin with a clean surface, unlike the fragmentary originals, or those replicas that emerge fully formed, and fully unformed, from the get. But when you make it yourself: every crack, every slip, every flaw is something you have to introduce yourself. You get to know the object from the inside out—not just what it looks like, but how it resists you.

    I picked this Flood Tablet precisely because it’s ambitious. It’s one of the most iconic inscriptions in the ancient world—a kind of cultural Rosetta Stone, linking Mesopotamian, biblical, and classical traditions. In fact, upon its discovery in the nineteenth century, its similarity to the later Abrahamic tradition sent shockwaves through the scholarly community—truly, its impact cannot be understated.

    What’s also beautiful and moving about it is its subject: survival, memory, and catastrophic loss. And it’s been copied, again and again, across centuries. To replicate it now is to take part in that long chain of transmission. It’s not just a story of a flood. It’s a story about what writing saves.

    1. The Original: Tablet XI and Its Aura

    A tablet subsequently discovered, containing the same story, approx. a millennium older than this tablet. Now in the Morgan Library: accession number 225906.

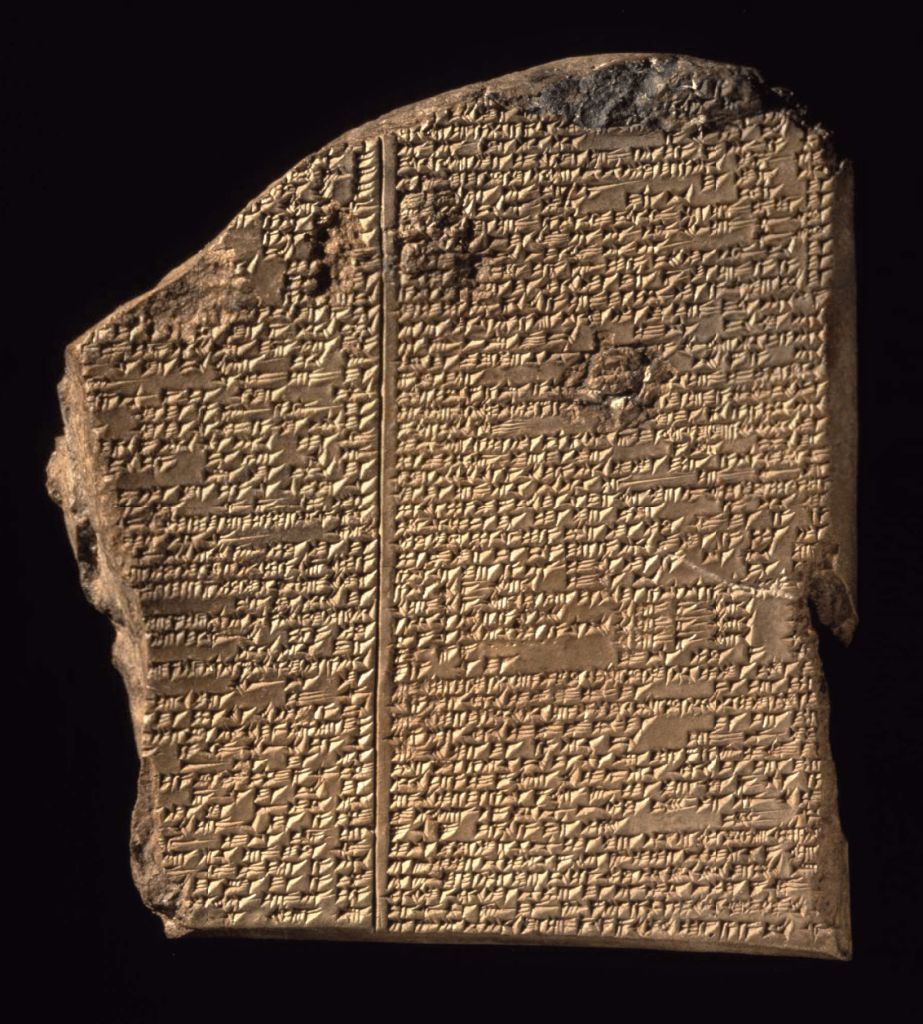
    Tablet XI of the Epic of Gilgamesh is arguably the most famous cuneiform text in the world. It tells the story of a great flood, a chosen survivor, a divine warning, and a boat filled with life—centuries before the Book of Genesis recorded a similar arc. In the narrative, Utnapishtim recounts to Gilgamesh how he escaped destruction, was granted immortality, and ultimately became the bearer of a knowledge that even kings could not command. It is one of the clearest points of contact between Mesopotamian myth and later Near Eastern and Mediterranean traditions. Read a translation here.

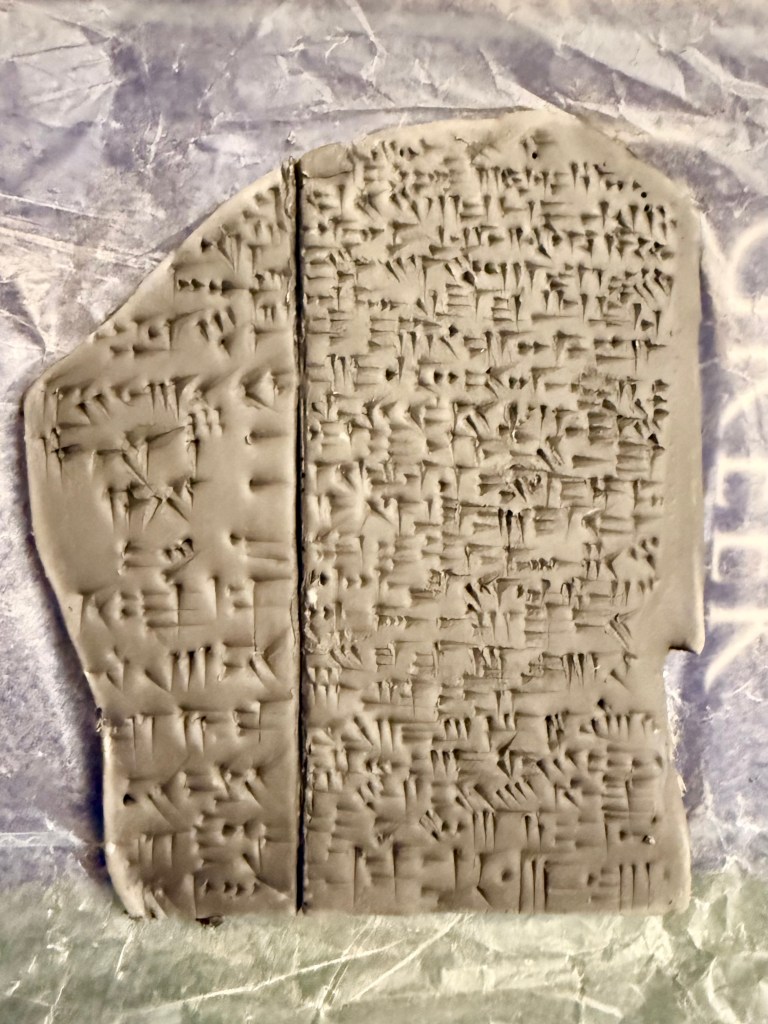
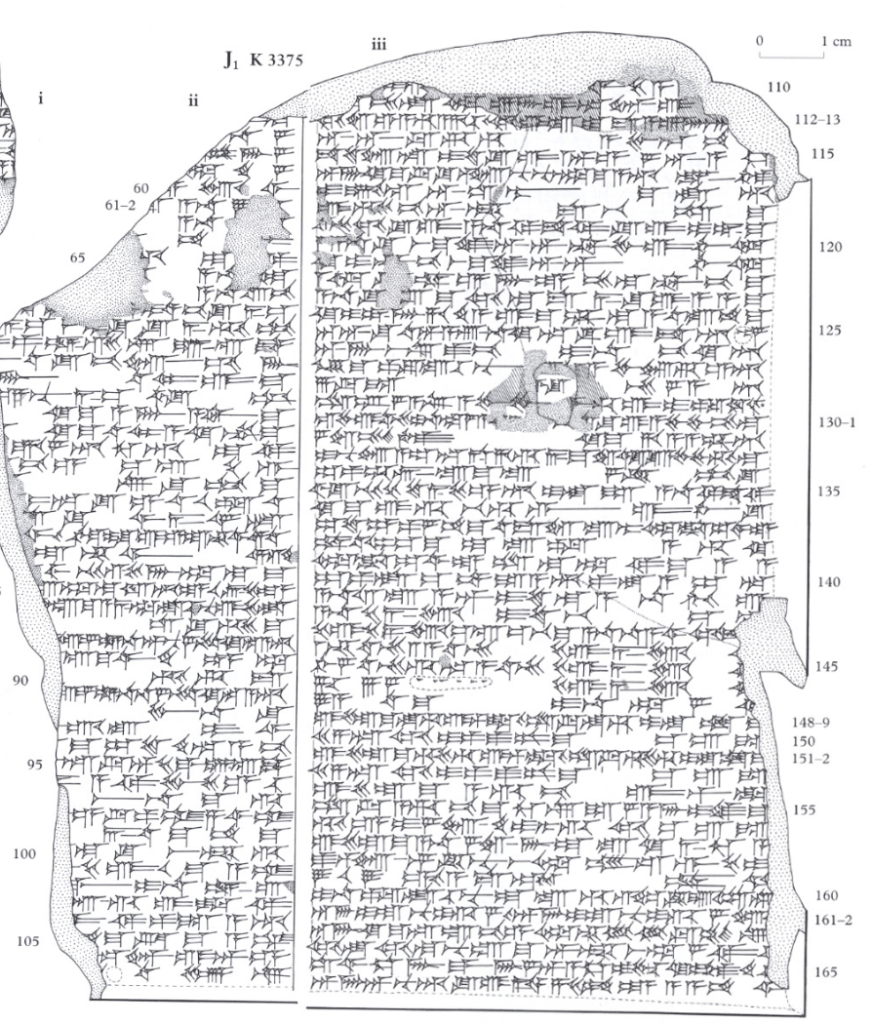
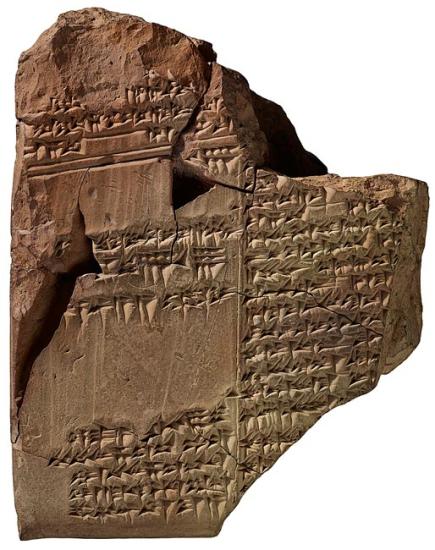
    Found in Nineveh (in the north of modern Iraq, on the Tigris River) on May 7, 1873 by archaeologist George Smith, the tablet is a large, convex slab of clay, its surface densely packed with tight, disciplined cuneiform lines. The edges are broken, some signs lost.

    But it’s not a draft or a throwaway. It was meant to endure. To try to recreate it is, in a small way, to step into that intention. The curvature, the spacing, the subtle tilt of each wedge: all these formal features speak not just to aesthetics, but to the technical mastery of the scribes who made them. This isn’t just a myth we inherited. It’s a craftwork that once held it.

    2. The Process

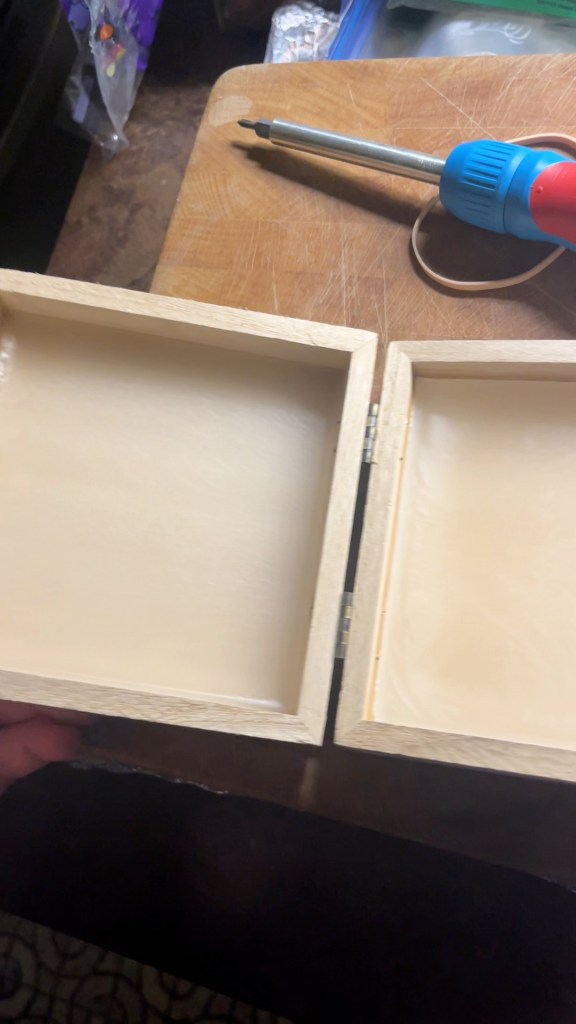
    I started with two pounds of grey air-dry clay and rolled it out to a thickness of about ¾ of an inch. I wanted enough depth to accommodate firm impressions without risking breakage—a balance between durability and responsiveness.

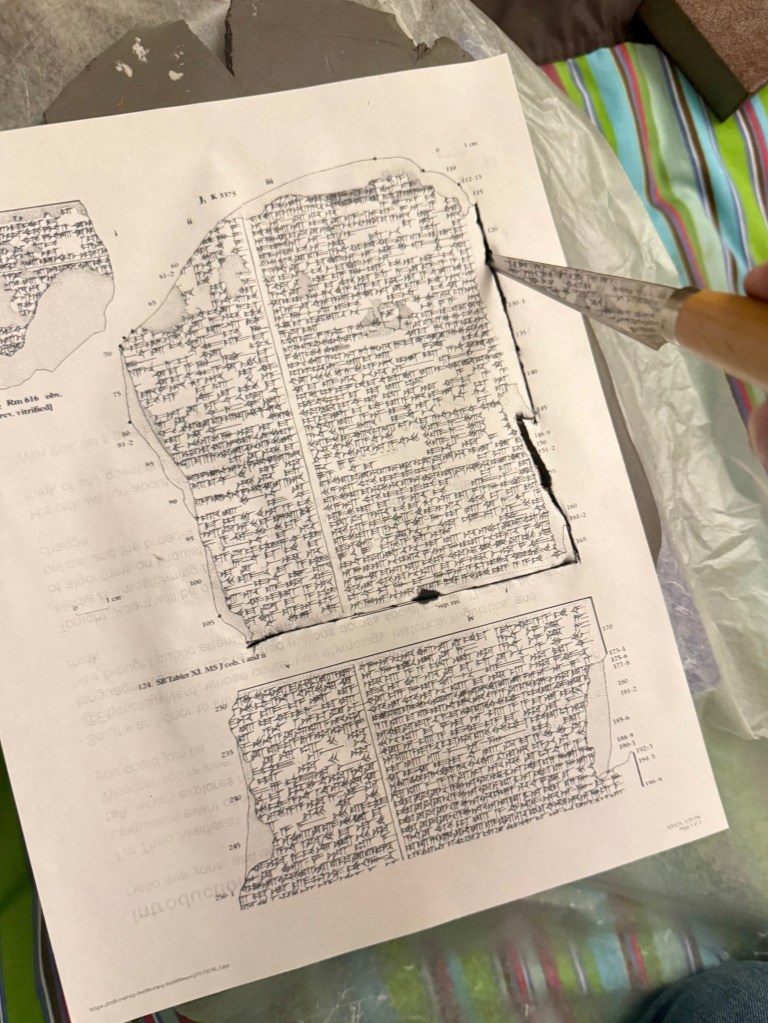
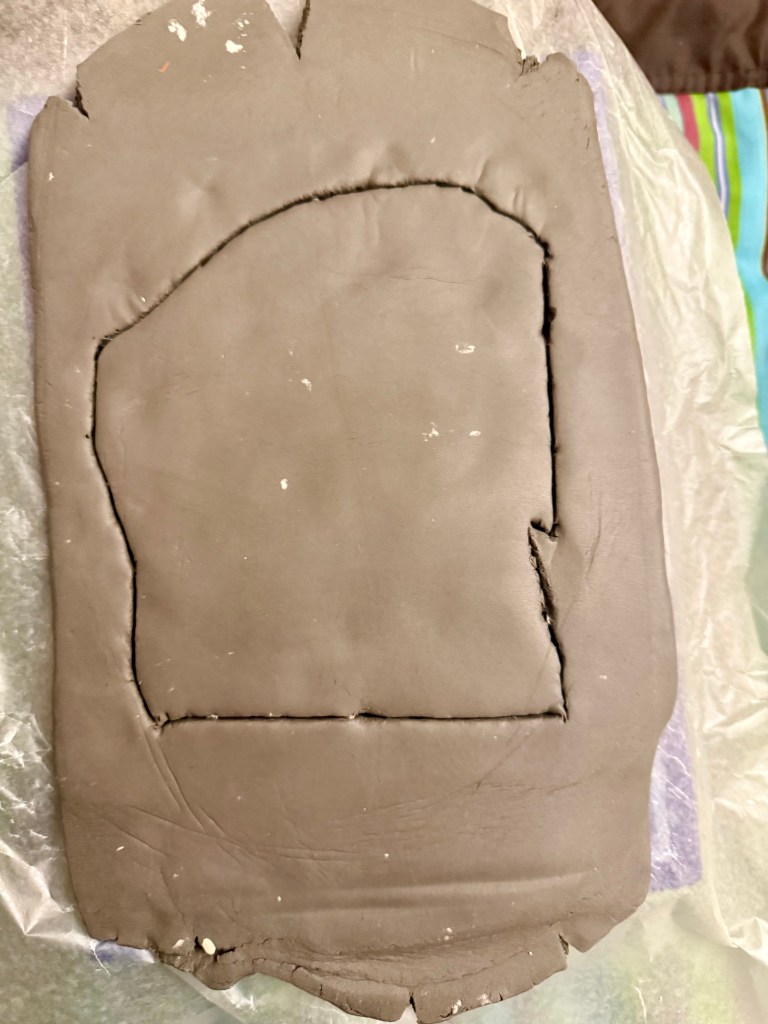
    Once I had a smooth surface, I printed a to-scale lineart of one side of the original tablet and laid it directly over the clay. Using a potter’s knife, I cut around the outline to form a proper slab.

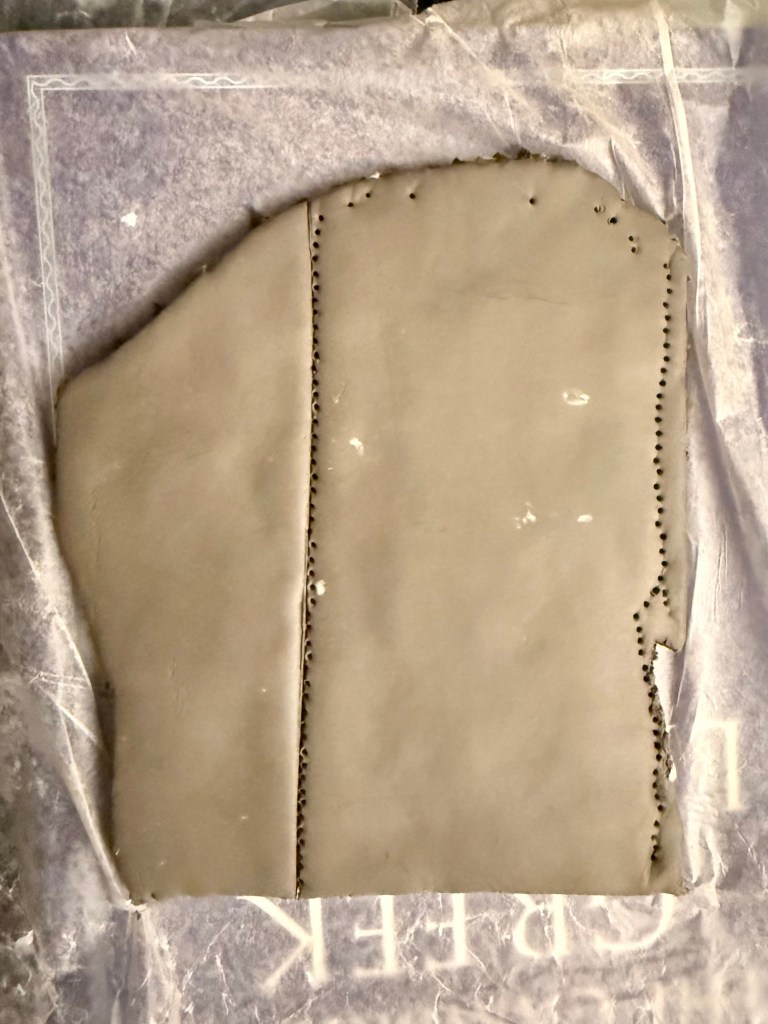
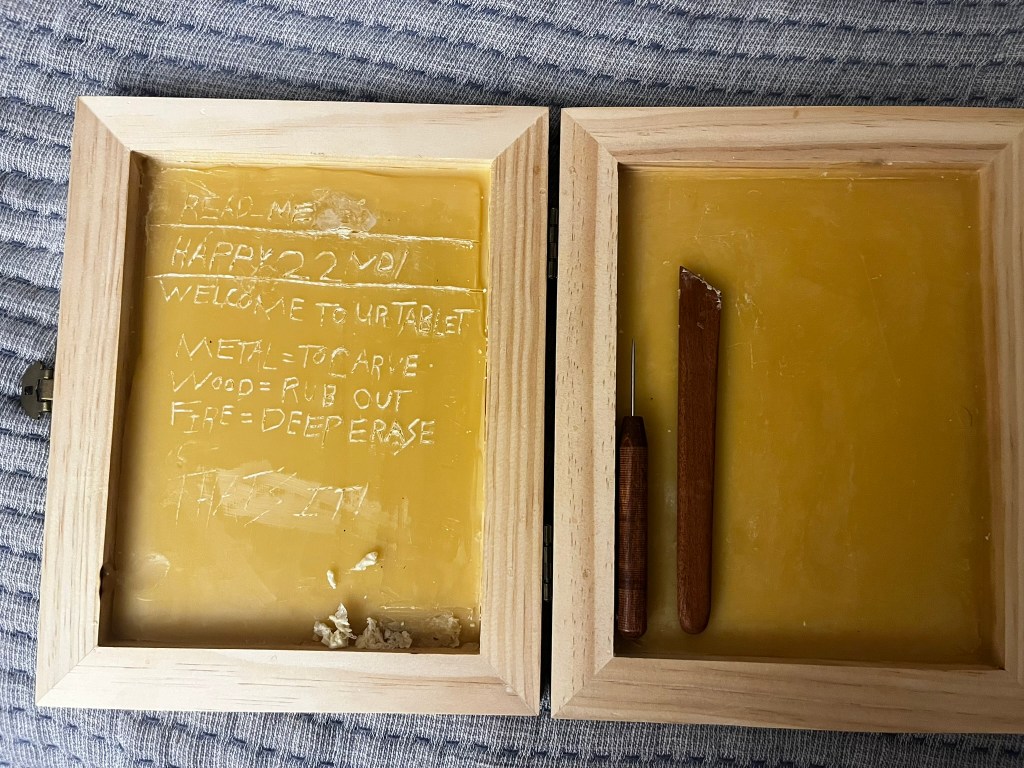
    I then scored the signature cleft line that bisects the original tablet. That line helped me rule the text. After that, to mark where each line of writing would begin and end, I took a needle and, with the paper still on top, pricked small bounding dots at the start and stop of every line. This gave me a grid of sorts—not formal ruling, but a subtle framework for spacing. I used actual cuneiform signs from the standard text, fitting in as much as I could per line (which, as I’ll tell you shortly, turned out to be not very much at all).

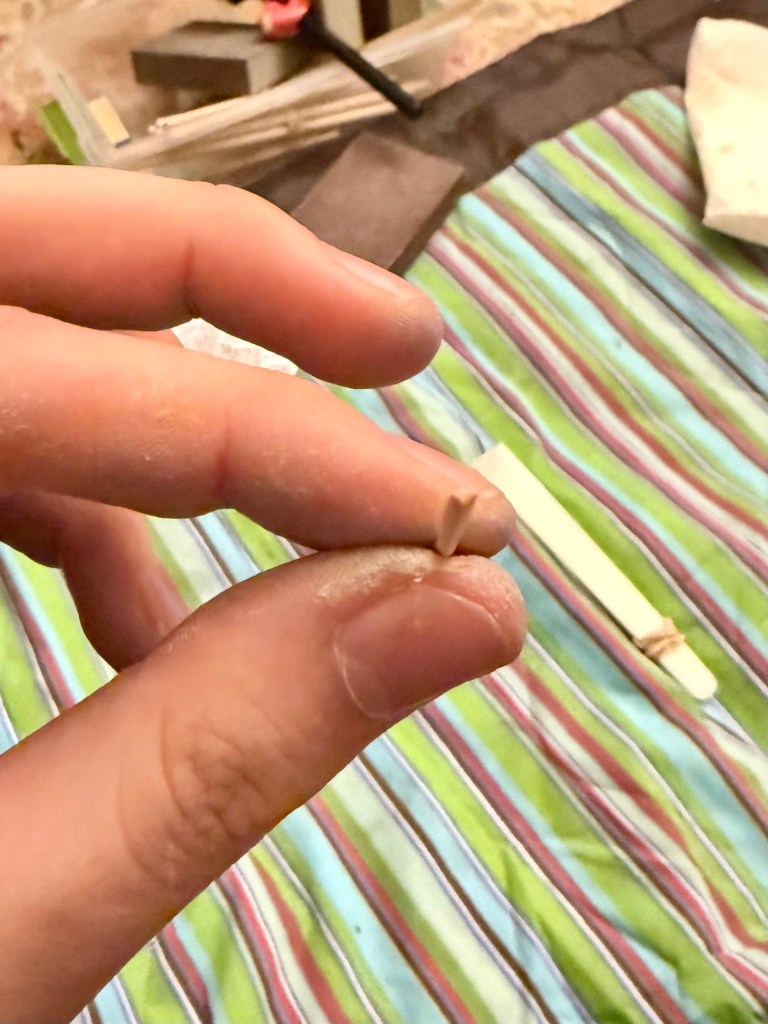
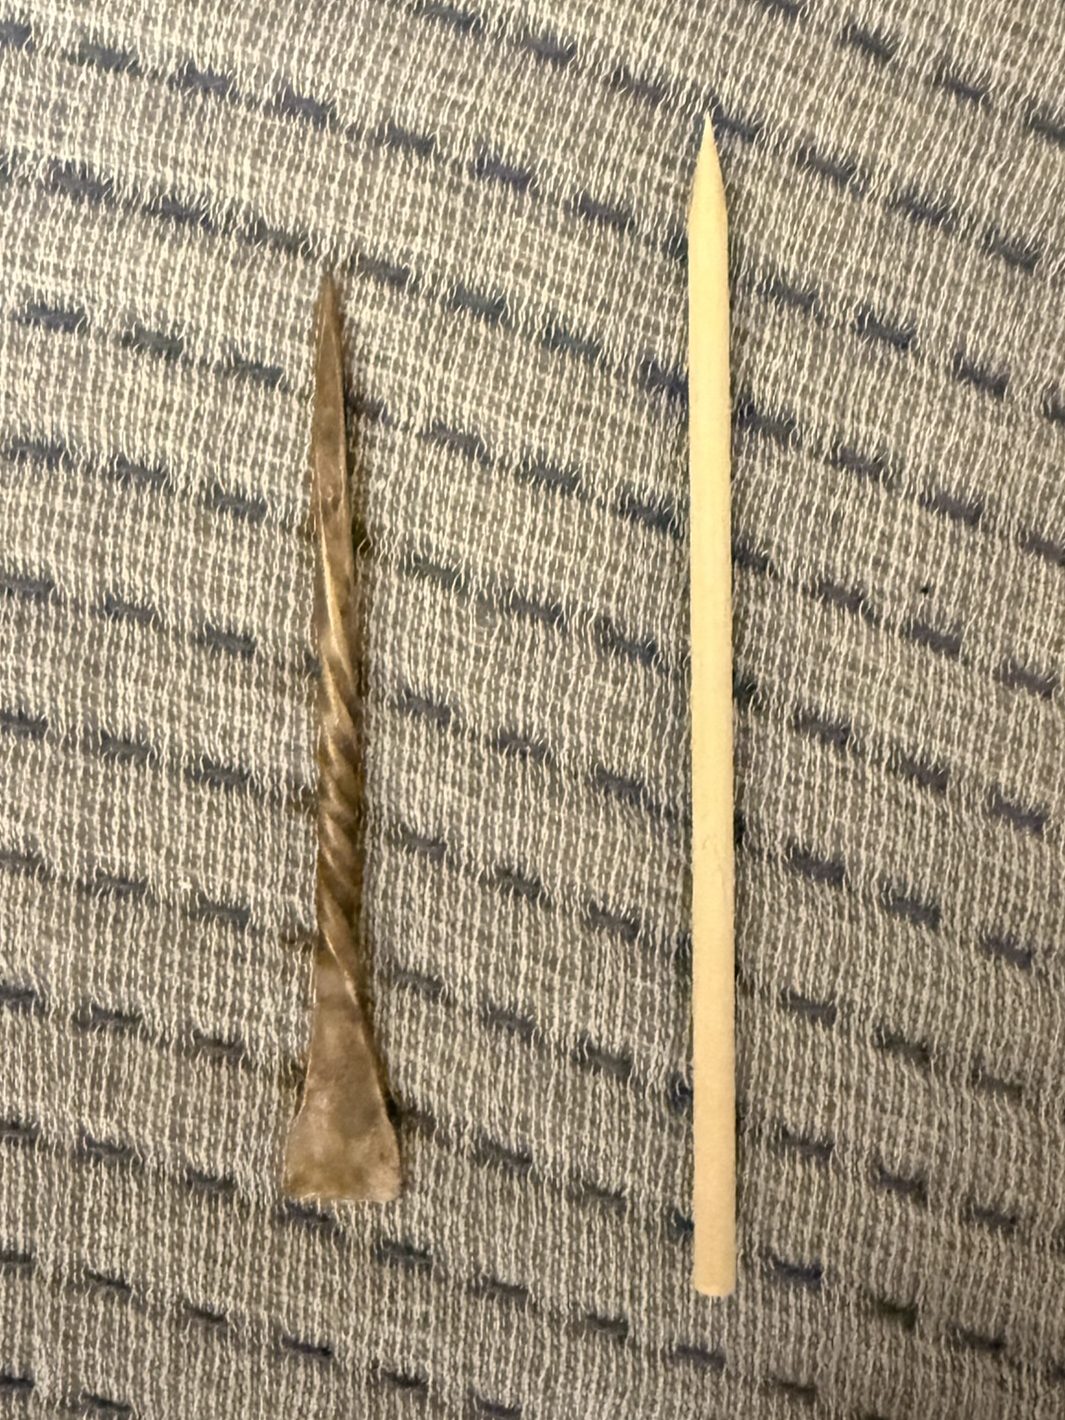
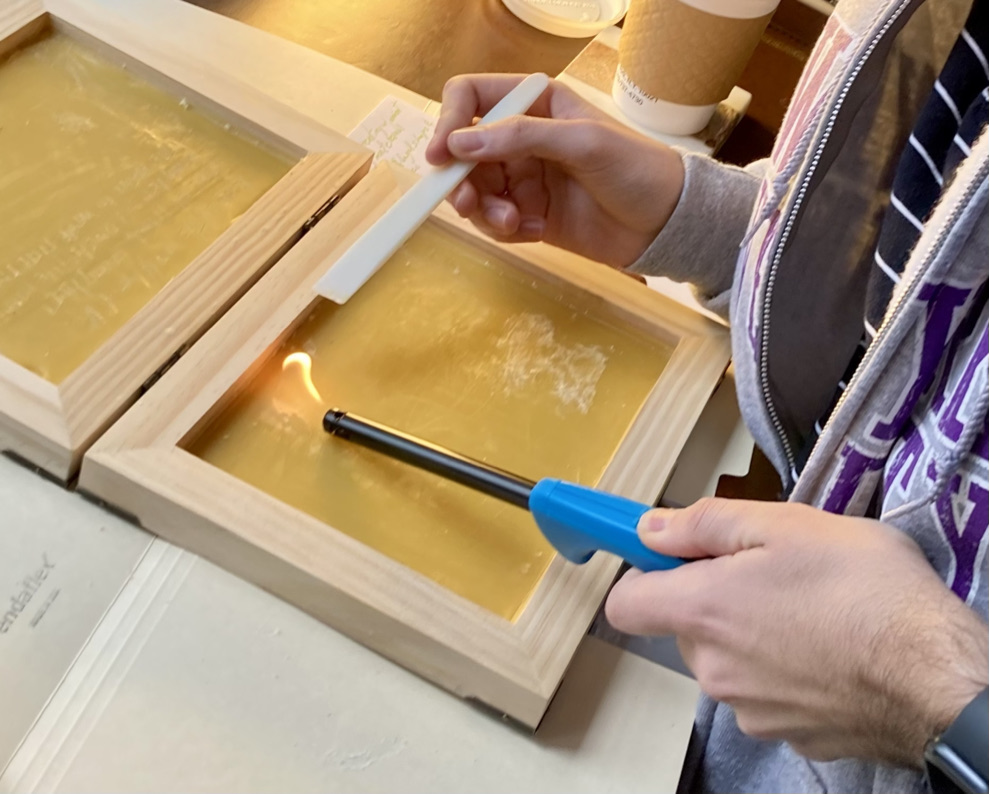
    For the inscription itself, I used a homemade stylus made from a square wooden dowel. I had sanded down one corner to create a slightly beveled edge that let me grip it more naturally—pinching it between thumb and middle finger, with my index finger guiding from above. In the course of things, I ended up using two styli. The first began to dull mysteriously partway through, possibly due to the water I kept brushing onto the clay to keep it soft. The wood was porous, and the repeated wetting may have softened or blunted its edges. I hadn’t expected tool fatigue quite so early in the process.

    3. Difficulties: Scale, Fatigue, and the Limits of Enthusiasm

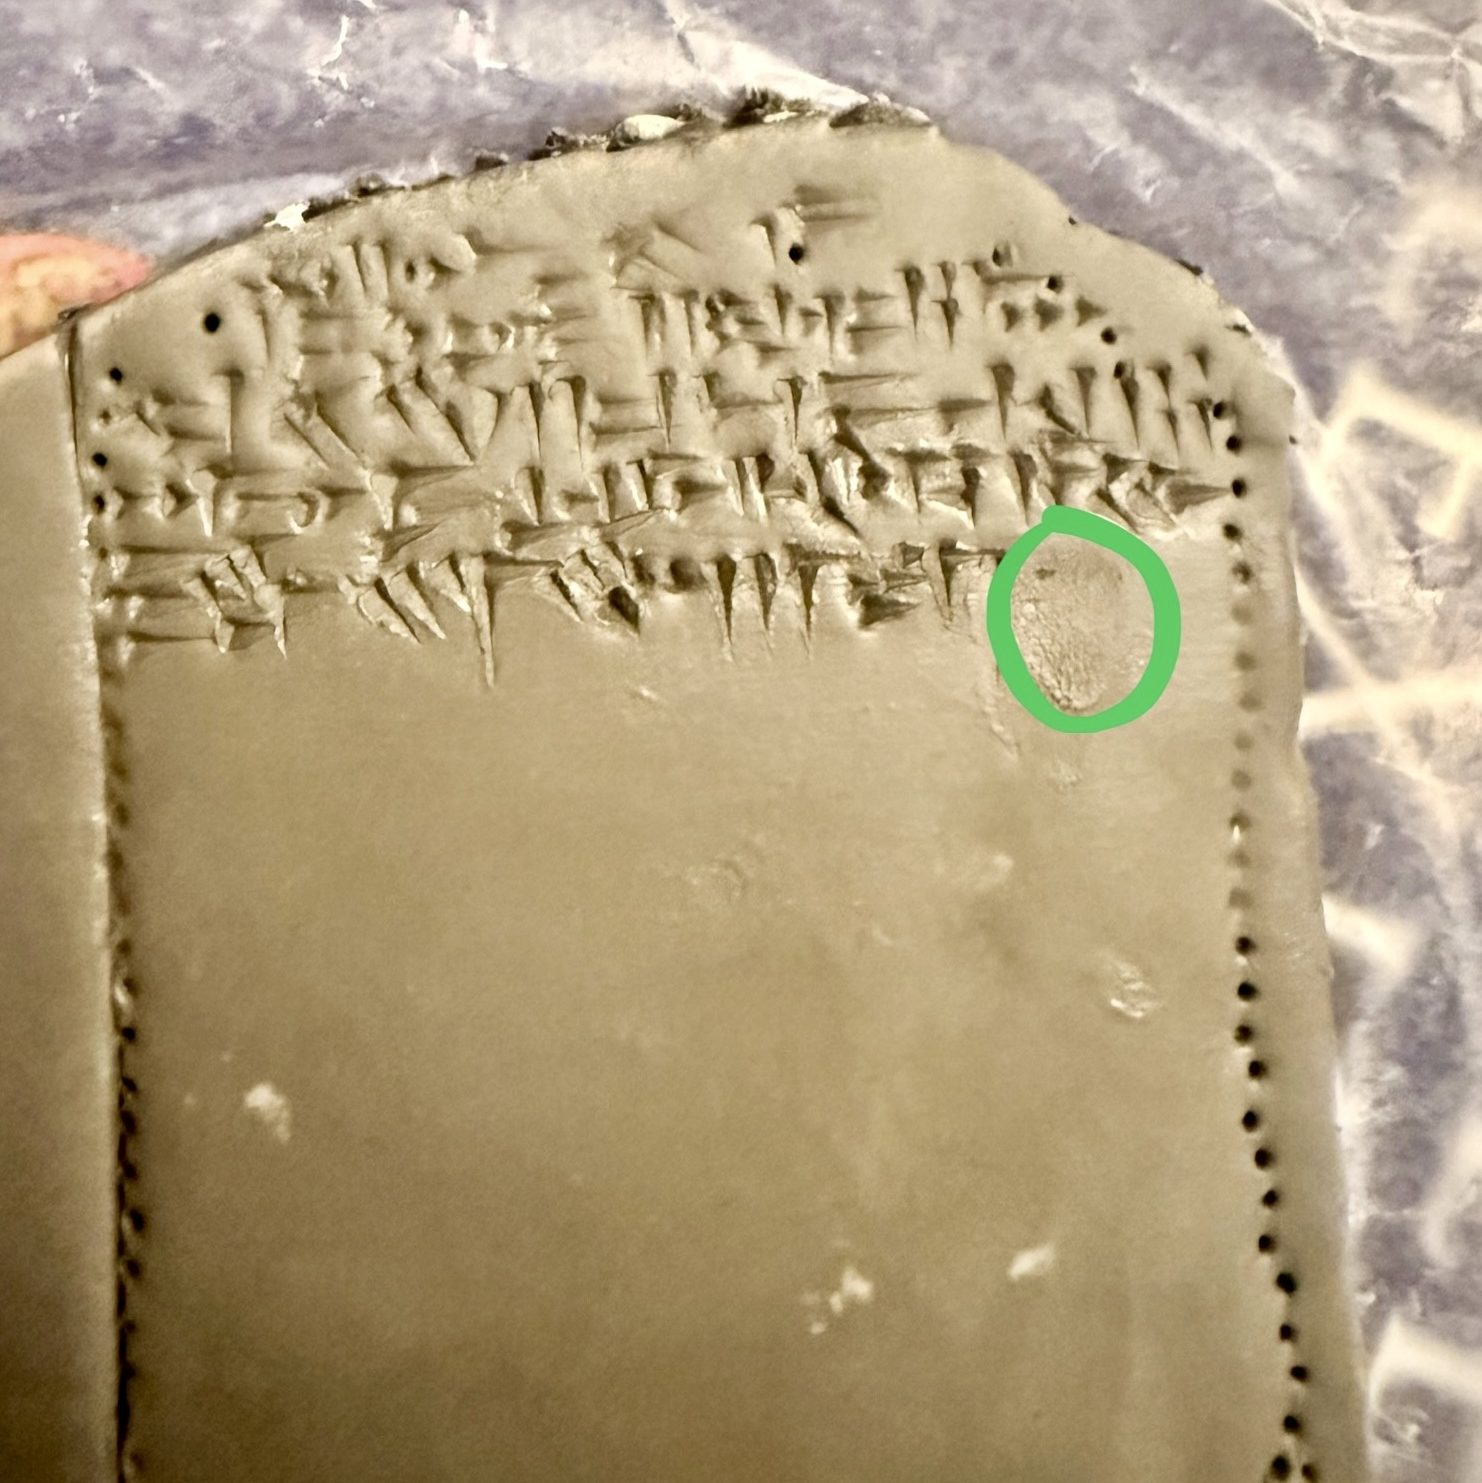
    What surprised me most was just how big my signs ended up being. Between the bluntness of my stylus and the limits of my own control, I found I could only produce cuneiform signs that were two to three times the height of the original inscriptions—and at least twice the width. The clay itself wasn’t the issue. If anything, it was a pleasure to work with: I kept smearing water across the surface with my fingertip, especially over unused areas, and that seemed to make the impressions cleaner and more precise. The medium was surprisingly forgiving, an example of an erasure using this technique is given above, in the green circle. My hands were not as pliant.

    I started at the top of the right-hand side of the tablet, and you can tell. My signs grew noticeably larger over time as fatigue set in. I spent around two hours just pressing wedges into the clay, and by the end I was feeling it. Not just in my hand, but in my attention span. I’d wildly underestimated how much text I could fit on the slab at the scale I was working—I probably would’ve needed to double the size to get anywhere close to the full line count of the original.

    By the end, I had learned what I came to learn—and felt ready to let it rest. I don’t plan to do the other side or fill in any missing fragments. This was enough to teach me what I wanted to know: how hard it is, how slow it is, how deliberate every single wedge has to be. The work left me with admiration, exhaustion, and just enough satisfaction to call it finished.

    4. Why It Was So Hard—And What That Tells Us

    This was the smallest scale of replica I’ve ever attempted, and still, my signs were roughly 2.5 times the size of the originals. And even at that inflated scale, I’m not confident I could accurately draw what I carved just by looking at the replica. That tells me a lot. It explains, viscerally, why there was an elite scribal class in Mesopotamian society, and why their training was so extensive. It wasn’t just about memorizing hundreds of signs—though that alone is a feat, especially for scribes working in multiple languages. It was about navigating a medium that added layers of challenge: spacing, shaping, texture, tool wear, and fatigue.

    I’ve long wanted to understand what made cuneiform so difficult—not just as a writing system, but as a practice. Even after studying the language on paper, I didn’t fully grasp the physical demands until I tried it myself.

    I wish we had spent even a single thirty-minute session in Akkadian I making tablets, especially at a small scale like this. The pedagogical value would’ve been enormous. You suddenly understand not just the abstract difficulty of the writing system, but the labor infrastructure around it—the apprenticeship, the specialization, the patience. This little experiment gave me a glimpse into that world, and for that, I’m genuinely grateful.

    5. Closing: A New Kind of Knowing

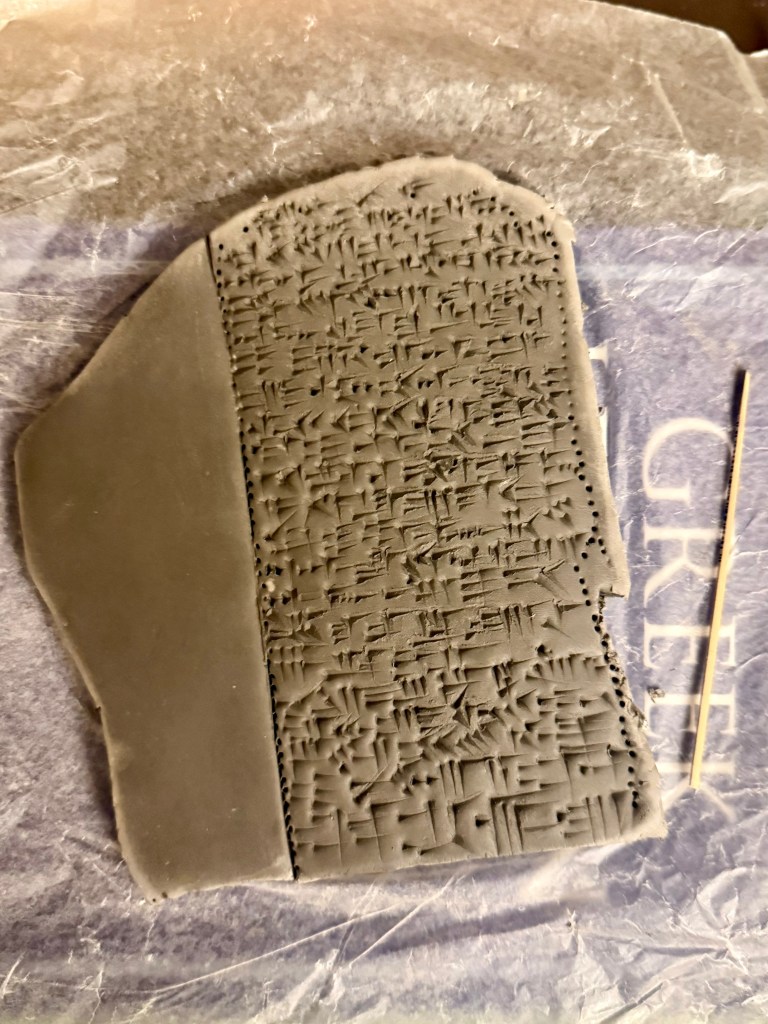
    I ended up with a lopsided, oversized, and incomplete tablet. But also: textured, hard-won, and deeply instructive. In the end, as it turns out, this wasn’t really about copying Tablet XI. It was about spending time inside its logic—its weight, its line spacing, its forgiving-but-not medium—and learning something I couldn’t have understood from a textbook.

    If you’re studying cuneiform, or even just curious about ancient writing, I can’t recommend this kind of tactile experiment enough. Make a stylus. Roll some clay from your local art-supply store. Try a single line. Your respect for those scribes will double. And you’ll probably come away, as I did, with something small and slightly ridiculous to keep on your shelf—a cracked echo of something monumental. Decidedly not a replica. Rather a kind of conversation.

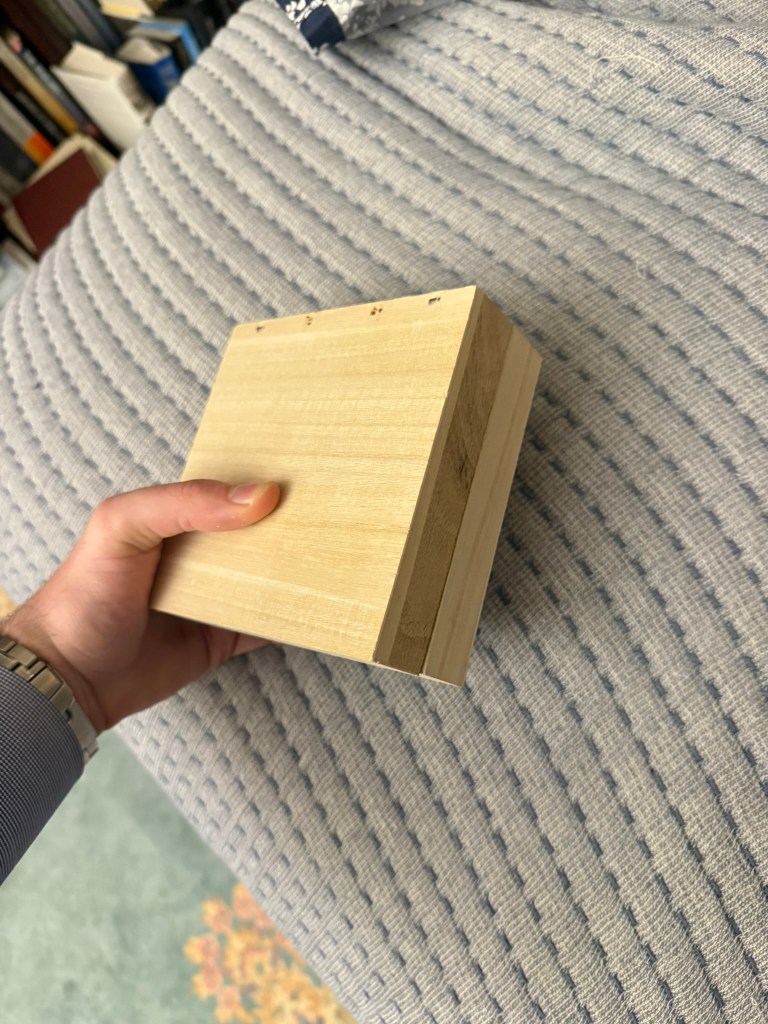
    Here’s the “finished” product:

  • Adventures in Materiality, 1: Wax Tablets at Home

    I’ve made a couple of these tablets, experimenting with form and function. I’ve been learning a lot about historical writing surfaces, woodworking, beeswax temperaments, and the tactile oddities of stylus-based writing. Below is a brief history of the form followed by a quick how-to, with some practical notes from my own experiments at the very end. All pictures are my own, except where attributed.

    A History

    Woman with wax tablets and stylus (so-called “Sappho”), Fresco, 50-79 CE. World History Encyclopedia.

    Wax tablets have roots that go back over three thousand years. Archaeologists have found bronze styli with pointed tips and flat spatula ends in Bronze Age Anatolia, and by the time of the Neo-Assyrian and Neo-Babylonian periods, it’s likely that wax tablets were being used for both cuneiform and the emerging Aramaic alphabet—showing them to be a flexible medium that could adapt to multiple writing systems. From there, the technology spread west via the Arameans and Phoenicians, eventually reaching the Greek world. The Greek word for a wax tablet, δέλτος, is actually a Phoenician loanword—ultimately from the Akkadian daltu, meaning “door.”

    Wooden Writing Tablets, Coptic, 500–700 CE. The Metropolitan Museum of Art.

    They’re particularly fascinating if you’re interested in letter forms. Because the stylus incises the wax, it encourages different motor habits and line qualities: straighter lines, more angular forms, and simpler geometries. That might be part of why early Greek inscriptions on stone look the way they do: the wax tablet was probably the everyday tool behind the scenes, shaping how people thought letters should be formed.

    At the same time, wax tablets allowed for quick, informal writing which makes them a crucial counterpart to the largely composed inscriptions that endured to today—the outcome of the ‘preservation bias.’ These tablets were a bridge between ephemeral thought and durable text, and working with them now offers a glimpse into how alphabets lived before fossilizing on stone.


    How-to

    0. Materials and Tools

    Tablet components:

    • 1 or 2 wooden panels with an inset well (Google “Cradled Wood Painting Panel” to find these)
    • Beeswax (at least 2 lbs to be safe, but adjust for size, naturally; here are the pellets which are on the softer side that I used for second tablet)
    • Optional hardware (examples that I used on larger tablet linked): closure, small lock with key, corner protectors

    Tools to melt the wax:

    • Pot
    • Something to melt wax in, ideally a Pyrex measuring cup or a glass bowl that sits atop the pot
    • ~1 liter of water
    • Spoon to mix beeswax as it melts (speeds up the process)

    Specifically for notebook-style tablets:

    • 2 small hinges and screws
    • Screwdriver (and drill if your wood is hard or your screws are large)
    • Ruler, for measuring hinge placement

    For the stylus:

    • A wooden dowel (ideally ~6mm or ¼ inch in diameter, this is most comfortable to hold and is the size of a standard pencil, meaning mechanical/electric sharpeners will be able to handle it)
    • Pencil sharpener or sharp knife
    • Sandpaper, ideally 40 or 80 grit (note: smaller the number, the rougher the grit)
    • Saw to cut the dowel, or strong hands to snap it
    • Optional: you can also just buy a bronze stylus which comes with flat “eraser” end

    1. Prepping the Wax

    First time around, I bought a 2-lb block of beeswax and used a hammer and stone-carving chisel to break it up—doable, but kind of a pain. It was also a hard wax, which made writing more difficult. Second time, I used pre-softened pellets from Amazon (linked in section above)—much easier to melt and work with.


    2. Melting and Pouring the Wax

    Use a double boiler setup (I used a Pyrex inside a pot of simmering water). Estimate the amount of wax needed by filling your wooden well with solid wax first, then dumping it into the Pyrex. Add about a third more than this, since melted wax takes up less space. Wait to pour the wax until it is fully liquefied, as below.

    IMPORTANT: Pour continuously! If you pause for even 10–15 seconds, you’ll get visible layers that don’t bond well.


    3. Cooling the Wax

    Let the wax cool on a level surface. You can refrigerate to speed things up—about 15 minutes for a thin layer, but I’d give it 30 minutes to be safe.

    This image on the left shows what fully hardened wax looks like.


    4. Assembly (For Notebook/Diptych Style)

    Measure hinge placement at ¼ and ¾ along the side where the panels meet. Center the hinge’s barrel over the seam. Use a drill for cleaner pilot holes if needed.

    If you’re using optional hardware like a latch or corner protectors, now’s the time. These can help disguise slight asymmetries or keep a wonky tablet shut.


    5. Making a Wooden Stylus

    Cut the dowel to your preferred length. I usually break it by hand, then sand the edge smooth. Sharpen one end to a point using either a pencil sharpener or a knife.

    If you’re using a knife:

    • Always cut away from your body
    • Consider using safety glove (this can be found at hardware and kitchen supply stores, not to mention online—I personally use Wüsthof’s)
    • Be most mindful of your body from elbow to fingertip—this is where most injuries occur in manufactury (shoutout to my friend at Dow Chemical for that tip).

    6. Writing, Erasing, and Experimenting

    Try varying your pressure and angle. Deeper strokes are easier to read but leave behind more excess wax. Shallower strokes are neater but harder to see. Softer wax helps a lot with both legibility and tactile feel.

    For erasing, you can use the flat end of a bronze stylus (mine is shaped like a little rake) or just warm the surface slightly (one of the pictures below has me using a pottery smoothing tool and a long-handled lighter) and smooth it over.


    My Observations

    • Wax hardness really matters. The softer wax is dramatically more forgiving (particularly when it comes to erasing) and is significantly more legible.
    • Depth vs. visibility is a real trade-off. Carving deeper makes your letters clearer but creates more crumbly debris and texture. Shallower strokes are neater but vanish in dim light, you really need to hold it at an angle so as to get a “raking light” angle.
    • I think it’d probably have been best as a personal memory tool. The writing isn’t super legible to others, and it can’t hold a ton. I’d think abbreviations would’ve been common, for the sake of economy—which would further ‘personalize’ the tablet and make it harder for another person to read.

    If you try this yourself, I’d love to hear about your materials and results—feel free to email me at tfavdw@nyu.edu!

  • Introduction (Pinned)

    Introduction (Pinned)

    Welcome to To Wake the Dead — a public research journal by Theo Avedisian.

    I study linguistics & archaeology at NYU, where I also run the League of Linguistics. I’m interested in how ancient languages and scripts evolve—how they’re shaped by material practices and continue to speak across space and time. This blog is a place for me to think aloud and document as I work across Greek, Akkadian, Latin, Phoenician, and French; build tools for studying writing systems; and reflect on the messier, more personal side of learning things slowly and deeply. Generally a record of mind, not of life.

    All writing and research shared here represent my own independent work and views. They are not reviewed, endorsed, or representative of any institution with which I am, or have been, affiliated.

    If you’re new here

    These are a few posts that capture both halves of my project—how I think about things and what I’m trying to build.

    Personal reflections:

    Research & method:

    Series

    The Tritropic Line
    Reflections on reading Homer’s Odyssey in three languages—Greek, French (Bérard), and English (Loeb series, Murray). This combines language study and comparative poetics with the slow joy of close reading.

    Tablets and Tribulations
    A record of my work with Akkadian, of which I’m now in my third semester. Named with as much reverence as chagrin.

    APEX Updates
    This is about my current research project on alphabetic transmission and paleography—mostly Greek and Phoenician. It includes progress notes, technical experiments, and the occasional map or dataset that cooperates. More process-oriented than the dedicated project site.

    Adventures in Materiality
    Here I document my experiments in carving, molding, inscribing, and replicating artifacts. The work is messy, and that’s the point.

    Linguistics for All
    Posts rooted in the events and conversations I help organize, especially through the NYU League of Linguistics. A mix of accessible theory, reflections on public linguistics, and notes on language’s role in community.

    Tools of the Trade
    Every so often, I write about a tool that has helped me read, write, map, or parse. This could be a corpus, a piece of software, or just a clever work-around I’ve devised. One upcoming project: online flashcards of Latin terms found in inscription commentary, making corpora more accessible for non-specialists.

    The Close Read
    Wherein I do a deep dive into a piece of literature, though some nonfiction as well. A fair bit of poetry, as it lends itself to my style.

    Marginalia
    A space for stray thoughts, reflections on studying dead languages as a living person, and the emotional archaeology that sometimes comes with long-term projects.

    This site is where I work in public—testing ideas, gathering feedback, and learning how attention itself becomes a method. Thanks for reading.

    —T

    Picture: Athens, 2021. Birthplace of my epigraphic obsession.